Backup And Restore In Windows 11 To NAS 2025: A Comprehensive Guide
Backup and Restore in Windows 11 to NAS 2025: A Comprehensive Guide
Related Articles: Backup and Restore in Windows 11 to NAS 2025: A Comprehensive Guide
Introduction
With great pleasure, we will explore the intriguing topic related to Backup and Restore in Windows 11 to NAS 2025: A Comprehensive Guide. Let’s weave interesting information and offer fresh perspectives to the readers.
Table of Content
- 1 Related Articles: Backup and Restore in Windows 11 to NAS 2025: A Comprehensive Guide
- 2 Introduction
- 3 Backup and Restore in Windows 11 to NAS 2025: A Comprehensive Guide
- 3.1 Introduction
- 3.2 Understanding Backup and Restore in Windows 11
- 3.3 Backing Up to NAS 2025
- 3.4 Restoring from NAS 2025
- 3.5 FAQs
- 3.6 Tips
- 3.7 Conclusion
- 4 Closure
Backup and Restore in Windows 11 to NAS 2025: A Comprehensive Guide
Introduction
Data backup and restore are essential tasks for any computer user, and Windows 11 offers a robust set of tools to facilitate these processes. By backing up your data to a Network Attached Storage (NAS) device like the NAS 2025, you can protect your valuable files from accidental deletion, hardware failure, or malware attacks. This guide will provide a comprehensive overview of backup and restore in Windows 11 to NAS 2025, including step-by-step instructions, FAQs, and tips.
Understanding Backup and Restore in Windows 11
Windows 11 offers two main backup and restore options:
- File History: This feature allows you to back up specific files and folders to a designated drive or network location. It is designed for incremental backups, only backing up files that have changed since the last backup.
- System Image Backup: This option creates a complete image of your system, including the operating system, installed programs, and data. It is a more comprehensive backup solution, but it also requires more storage space.
Backing Up to NAS 2025
To back up your data to NAS 2025, you can use either File History or System Image Backup.
File History:
- Connect your NAS 2025 to your network and ensure it is accessible from your Windows 11 computer.
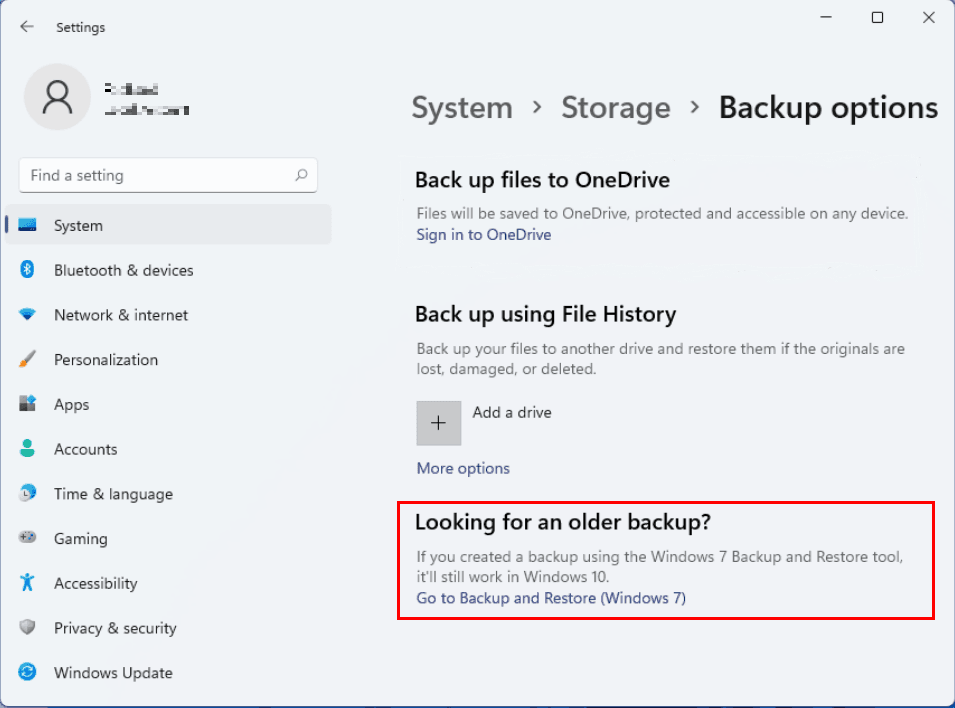
- Open the Settings app and navigate to "System" > "Storage" > "Backup options."
- Under "Back up using File History," click "Add a drive."
- Select your NAS 2025 from the list of available drives and click "OK."
- Configure the backup schedule and other options as desired.
- Click "Back up now" to initiate the backup process.
System Image Backup:
- Connect your NAS 2025 to your network and ensure it is accessible from your Windows 11 computer.
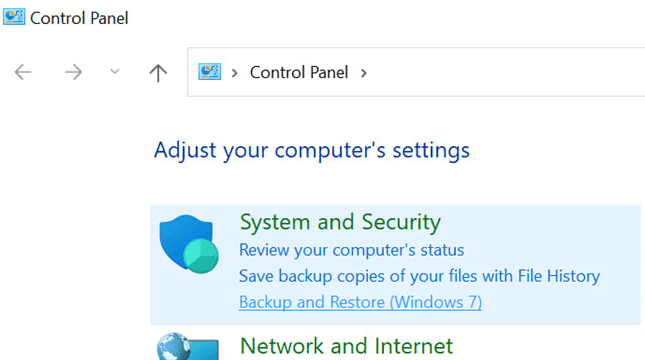
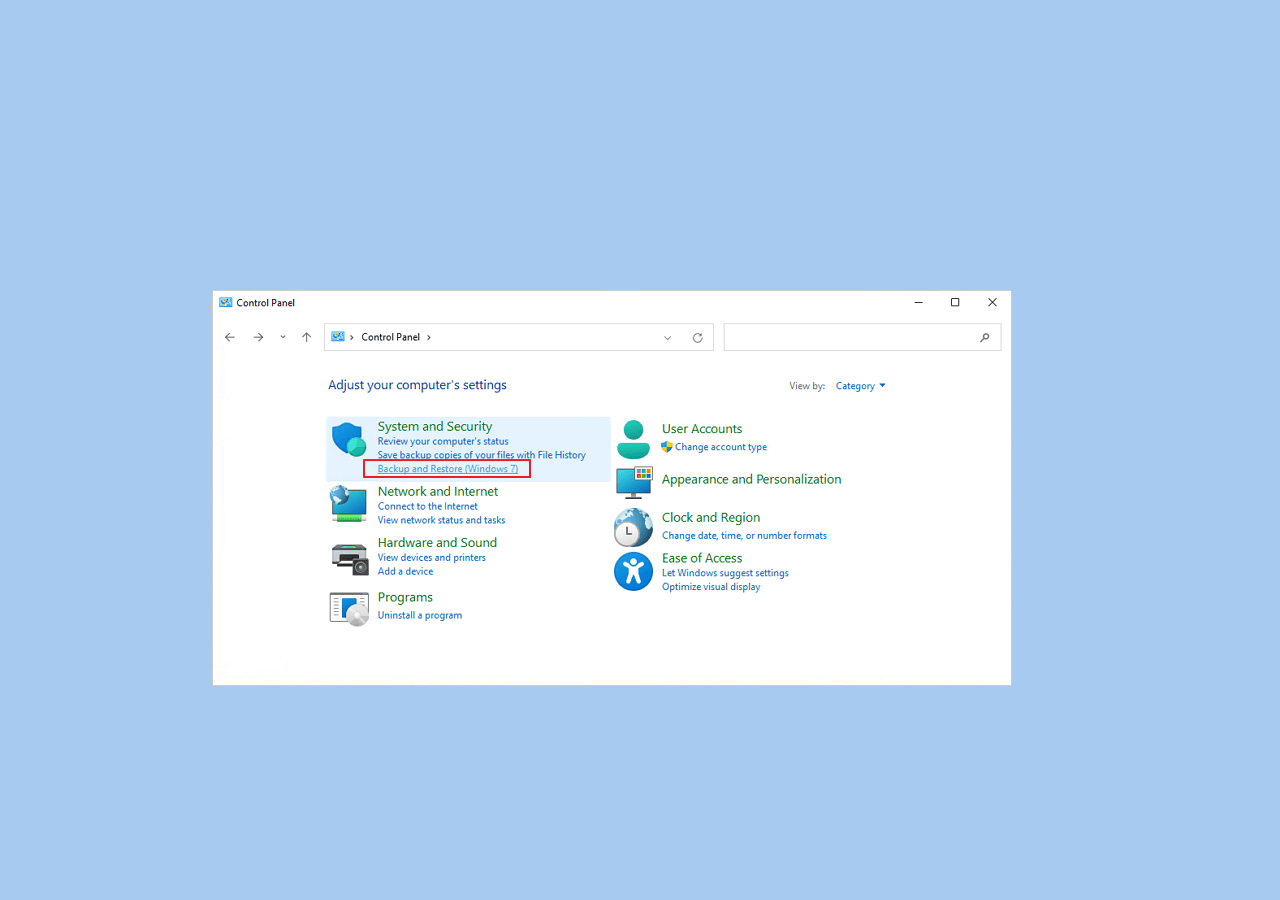
- Open the Control Panel and navigate to "System and Security" > "Backup and Restore (Windows 7)."
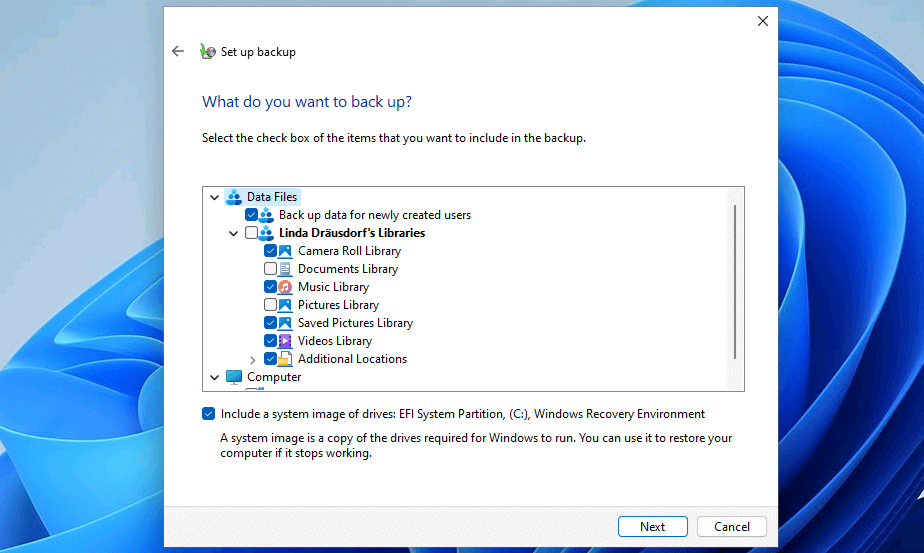
- Click "Create a system image."
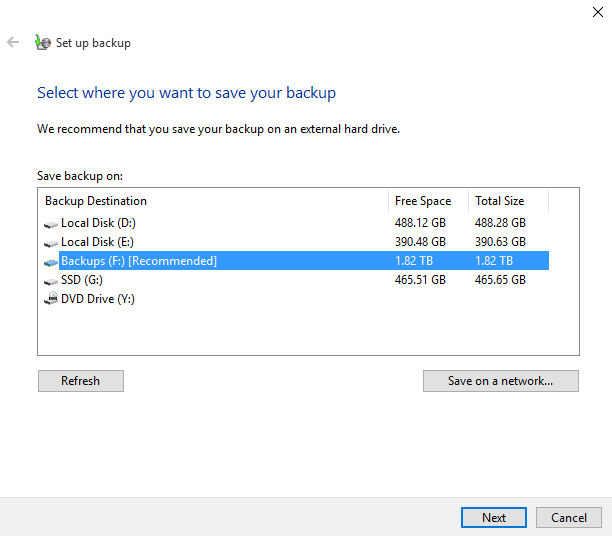
- Select "On a network location" as the backup destination and click "Next."
- Select your NAS 2025 from the list of available network locations and click "OK."
- Configure the backup schedule and other options as desired.
- Click "Start backup" to initiate the backup process.
Restoring from NAS 2025
In the event of data loss, you can restore your data from your NAS 2025 using either File History or System Image Backup.
File History:
- Connect your NAS 2025 to your network and ensure it is accessible from your Windows 11 computer.
- Open the Settings app and navigate to "System" > "Storage" > "Backup options."
- Under "Restore files from a backup," click "Restore personal files" or "Restore system settings" depending on the type of data you want to restore.
- Follow the on-screen instructions to select the files or settings you want to restore.
System Image Backup:
- Connect your NAS 2025 to your network and ensure it is accessible from your Windows 11 computer.
- Boot your computer from the Windows 11 installation media.
- On the Windows Setup screen, click "Repair your computer."
- Click "Troubleshoot" > "Advanced options" > "System Image Recovery."
- Select your NAS 2025 as the backup source and click "Next."
- Follow the on-screen instructions to complete the restore process.
FAQs
Q: What are the benefits of backing up my data to NAS 2025?
A: Backing up to NAS 2025 offers several benefits, including:
- Data protection: Protects your data from accidental deletion, hardware failure, or malware attacks.
- Remote access: Access your backed-up data from anywhere with an internet connection.
- Scalability: Expand your storage capacity as needed by adding additional hard drives to your NAS 2025.
Q: How often should I back up my data?
A: The frequency of your backups depends on the importance of your data and how often it changes. For critical data, it is recommended to back up daily or even more frequently.
Q: Can I restore individual files from a system image backup?
A: No, system image backups do not allow you to restore individual files. They restore the entire system, including the operating system, installed programs, and data.
Tips
- Use a strong password: Protect your backups by using a strong password for your NAS 2025.
- Encrypt your backups: Consider encrypting your backups to protect them from unauthorized access.
- Test your backups: Regularly test your backups to ensure they are working properly.
- Keep your NAS 2025 updated: Install the latest firmware updates for your NAS 2025 to ensure optimal performance and security.
Conclusion
Backing up and restoring your data to NAS 2025 is a crucial task for protecting your valuable information. By following the steps outlined in this guide, you can ensure that your data is safe and easily accessible in the event of a data loss scenario. Remember to regularly back up your data, test your backups, and keep your NAS 2025 updated to maintain a robust and reliable backup and restore system.
![How Do I Back Up PC Automatically in Windows 11 [Get 3 Ways] - EaseUS](https://www.easeus.com/images/en/screenshot/todo-backup/guide/backup-restore-1.jpg)
Closure
Thus, we hope this article has provided valuable insights into Backup and Restore in Windows 11 to NAS 2025: A Comprehensive Guide. We appreciate your attention to our article. See you in our next article!